
I just uploaded a video showing how you can change the HSL values of any VCL Style in runtime using the VCL Styles Utils library. in the code google site you can found the the full source code of the application and more demo projects.
Category Archives: Delphi XE2
Exploring Delphi XE2 – VCL Styles Part III
Update : this project now is hosted on Github.
Introduction
The VCL Styles are great but it seems that was designed to hide (and protect?) a lot of useful properties and classes. Because that I wrote a small (for the moment) library that using class helpers (and another tricks) can access to hidden properties and classes of the VCL Styles. Today I will show you how using this library you can create a previewer for your vcl styles.
When you design a GUI and include the option to change the current VCL Style of an application you generally provide a list of the availables VCL Styles, then the user without knowing nothing about the appearance of the style must choose one and then apply the changes. Well you can improve the user experience showing a preview image of the VCL style before to apply the selection.
Check out this sample image of a settings option of the WDCC, that shows a preview of the VCL Styles.

The internals
The TStyleManager class contains an internal collection with all the registered (loaded) styles, this list is stored in a Dictionary class var like this FRegisteredStyles: TDictionary; and each TPair contains the style name and a TSourceInfo value.
This is the definition of the TSourceInfo type
TStyleServicesHandle = type Pointer;
  strict private type
    TSourceInfo = record
      Data: TStyleServicesHandle;
      StyleClass: TCustomStyleServicesClass;
    end;
The Data field point to a TStream that contains all the objects and bitmaps related to the style and the StyleClass field has the type of the class Style Service. Now in order to access the visual elements of the style we need interpret the content of the Data field. The logic to interpret the streams with the VCL style info is placed in two files StyleUtils.inc and StyleAPI.inc, these files are in the source\vcl folder of your Rad Studio installation. As probably you must know these files are not units and are embedded in the implementation part of the Vcl.Styles unit, because that the classes and methods of these files are not accesible in any way (for now).
Note : The StyleUtils.inc and StyleAPI.inc files contains code that originally was part of the SkineEngine library of Eugene A. Kryukov (Yeah Eugene is the original author of the DXScene the antecesor of FireMonkey).
Accesing the TSourceInfo
The first task is gain access to the class var FRegisteredStyles of the TStyleManager class. So using a class helper we can do the trick.
  //we need redeclare these types because are defined as <em>strict private</em> types inside of the <em>TStyleManager </em>class and are not accesible of outside.
  TStyleServicesHandle = type Pointer;
  TSourceInfo = record
    Data: TStyleServicesHandle;
    StyleClass: TCustomStyleServicesClass;
  end;

  //the class helper
  TStyleManagerHelper = Class Helper for TStyleManager
  strict private
    class function GetStyleSourceInfo(const StyleName: string): TSourceInfo; static;
  public
   class function GetRegisteredStyles: TDictionary<string, TSourceInfo>;
   class property StyleSourceInfo[const StyleName: string]: TSourceInfo read GetStyleSourceInfo;
  end;

class function TStyleManagerHelper.GetRegisteredStyles: TDictionary<string, TSourceInfo>;
var
  t            : TPair<string, TStyleManager.TSourceInfo>;
  SourceInfo   : TSourceInfo;
begin
 Result:=TDictionary<string, TSourceInfo>.Create;
  for t in Self.FRegisteredStyles do
  begin
   SourceInfo.Data:=t.Value.Data;
   SourceInfo.StyleClass:=t.Value.StyleClass;
   Result.Add(t.Key,SourceInfo);
  end;
end;

class function TStyleManagerHelper.GetStyleSourceInfo(const StyleName: string): TSourceInfo;
Var
 LRegisteredStyles : TDictionary<string, TSourceInfo>;
begin
  LRegisteredStyles:=TStyleManager.GetRegisteredStyles;
  try
    if LRegisteredStyles.ContainsKey(StyleName) then
      Result:=LRegisteredStyles[StyleName];
  finally
     LRegisteredStyles.Free;
  end;
end;
So in this point we have access to the TSourceInfo of each registered style. Now we can use the above class helper in this way
var
  SourceInfo: TSourceInfo;
begin
  SourceInfo:=TStyleManager.StyleSourceInfo[StyleName];
  //do something
end;
Writting a TCustomStyle
The second part of the task is interpret the stream stored in TSourceInfo.Data, to do this we need create a TCustomStyle descendant class and use the code of the StyleUtils.inc and StyleAPI.inc files. The TCustomStyle class has a private field FSource: TObject; that store the VCL Style content (objects, fonts, colors, bitmaps and so on) this field must be filled with the content of the Stream stored in the TSourceInfo.Data. After of that you will have a new Style Class ready to use as you want.
This is the definiton of the TCustomStyleExt class.
type
  TCustomStyleHelper = Class Helper for TCustomStyle
  private
    function GetSource: TObject;
  public
    property Source: TObject read GetSource;
  End;

  TCustomStyleExt = class(TCustomStyle)
  strict private
    FStream    : TStream;
  public
    function  GetStyleInfo : TStyleInfo;
  public
    constructor Create(const FileName :string);overload;
    constructor Create(const Stream:TStream);overload;
    destructor Destroy;override;
    property StyleInfo : TStyleInfo read GetStyleInfo;
  end;

//we need include this files in the implemnetation part to use the TseStyle class
{$I 'C:\Program Files (x86)\Embarcadero\RAD Studio\9.0\source\vcl\StyleUtils.inc'}
{$I 'C:\Program Files (x86)\Embarcadero\RAD Studio\9.0\source\vcl\StyleAPI.inc'}

//Gain acess to the FSource field of the TCustomStyle
function TCustomStyleHelper.GetSource: TObject;
begin
  Result:=Self.FSource;
end;

//with this constructor we can load a Vcl Style file, without register in the system
constructor TCustomStyleExt.Create(const FileName: string);
var
  LStream: TFileStream;
begin
  LStream := TFileStream.Create(FileName, fmOpenRead);
  try
    Create(LStream);
  finally
    LStream.Free;
  end;
end;

//Load an stream with the Vcl Style Data
constructor TCustomStyleExt.Create(const Stream: TStream);
begin
  inherited Create;
  FStream:=TMemoryStream.Create;

  Stream.Seek(0, soBeginning); //set position to 0 before to copy
  FStream.CopyFrom(Stream, Stream.Size); //copy the content in a local stream
  Stream.Seek(0, soBeginning); //very importan restore the index to 0.

  FStream.Seek(0, soBeginning);//set position to 0 before to load
  TseStyle(Source).LoadFromStream(FStream);//makes the magic, fill the
end;

//free the resources
destructor TCustomStyleExt.Destroy;
begin
  if Assigned(FStream) then
    FStream.Free;
  inherited Destroy;
end;

//Get misc info about the Vcl Style
function TCustomStyleExt.GetStyleInfo: TStyleInfo;
begin
 Result.Name        :=  TseStyle(Source).StyleSource.Name;
 Result.Author      :=  TseStyle(Source).StyleSource.Author;
 Result.AuthorEMail :=  TseStyle(Source).StyleSource.AuthorEMail;
 Result.AuthorURL   :=  TseStyle(Source).StyleSource.AuthorURL;
 Result.Version     :=  TseStyle(Source).StyleSource.Version;
end;
Creating the preview
Finally now we can create a image that represent the VCL Style.
Check out the code to create a simple image of a form using a TCustomStyle.
//draws a form (window) over a Canvas using a TCustomStyle
procedure DrawSampleWindow(Style:TCustomStyle;Canvas:TCanvas;ARect:TRect;const ACaption : string);
var
  LDetails        : TThemedElementDetails;
  CaptionDetails  : TThemedElementDetails;
  IconDetails     : TThemedElementDetails;
  IconRect        : TRect;
  BorderRect      : TRect;
  CaptionRect     : TRect;
  ButtonRect      : TRect;
  TextRect        : TRect;
  CaptionBitmap   : TBitmap;

    function GetBorderSize: TRect;
    var
      Size: TSize;
      Details: TThemedElementDetails;
      Detail: TThemedWindow;
    begin
      Result  := Rect(0, 0, 0, 0);
      Detail  := twCaptionActive;
      Details := Style.GetElementDetails(Detail);
      Style.GetElementSize(0, Details, esActual, Size);
      Result.Top := Size.cy;
      Detail := twFrameLeftActive;
      Details := Style.GetElementDetails(Detail);
      Style.GetElementSize(0, Details, esActual, Size);
      Result.Left := Size.cx;
      Detail := twFrameRightActive;
      Details := Style.GetElementDetails(Detail);
      Style.GetElementSize(0, Details, esActual, Size);
      Result.Right := Size.cx;
      Detail := twFrameBottomActive;
      Details := Style.GetElementDetails(Detail);
      Style.GetElementSize(0, Details, esActual, Size);
      Result.Bottom := Size.cy;
    end;

    function RectVCenter(var R: TRect; Bounds: TRect): TRect;
    begin
      OffsetRect(R, -R.Left, -R.Top);
      OffsetRect(R, 0, (Bounds.Height - R.Height) div 2);
      OffsetRect(R, Bounds.Left, Bounds.Top);
      Result := R;
    end;

begin
  BorderRect := GetBorderSize;

  CaptionBitmap := TBitmap.Create;
  CaptionBitmap.SetSize(ARect.Width, BorderRect.Top);

  //Draw background
  LDetails.Element := teWindow;
  LDetails.Part := 0;
  Style.DrawElement(Canvas.Handle, LDetails, ARect);

  //Draw caption border
  CaptionRect := Rect(0, 0, CaptionBitmap.Width, CaptionBitmap.Height);
  LDetails := Style.GetElementDetails(twCaptionActive);
  Style.DrawElement(CaptionBitmap.Canvas.Handle, LDetails, CaptionRect);
  TextRect := CaptionRect;
  CaptionDetails := LDetails;

  //Draw icon
  IconDetails := Style.GetElementDetails(twSysButtonNormal);
  if not Style.GetElementContentRect(0, IconDetails, CaptionRect, ButtonRect) then
    ButtonRect := Rect(0, 0, 0, 0);
  IconRect := Rect(0, 0, GetSystemMetrics(SM_CXSMICON), GetSystemMetrics(SM_CYSMICON));
  RectVCenter(IconRect, ButtonRect);
  if ButtonRect.Width > 0 then
   if Assigned(Application.MainForm) then
    DrawIconEx(CaptionBitmap.Canvas.Handle, IconRect.Left, IconRect.Top, Application.MainForm.Icon.Handle, 0, 0, 0, 0, DI_NORMAL);

  Inc(TextRect.Left, ButtonRect.Width + 5);

  //Draw buttons

  //Close button
  LDetails := Style.GetElementDetails(twCloseButtonNormal);
  if Style.GetElementContentRect(0, LDetails, CaptionRect, ButtonRect) then
   Style.DrawElement(CaptionBitmap.Canvas.Handle, LDetails, ButtonRect);

  //Maximize button
  LDetails := Style.GetElementDetails(twMaxButtonNormal);
  if Style.GetElementContentRect(0, LDetails, CaptionRect, ButtonRect) then
    Style.DrawElement(CaptionBitmap.Canvas.Handle, LDetails, ButtonRect);

  //Minimize button
  LDetails := Style.GetElementDetails(twMinButtonNormal);

  if Style.GetElementContentRect(0, LDetails, CaptionRect, ButtonRect) then
    Style.DrawElement(CaptionBitmap.Canvas.Handle, LDetails, ButtonRect);

  //Help button
  LDetails := Style.GetElementDetails(twHelpButtonNormal);
  if Style.GetElementContentRect(0, LDetails, CaptionRect, ButtonRect) then
    Style.DrawElement(CaptionBitmap.Canvas.Handle, LDetails, ButtonRect);

  if ButtonRect.Left > 0 then
    TextRect.Right := ButtonRect.Left;

  //Draw text
  Style.DrawText(CaptionBitmap.Canvas.Handle, CaptionDetails, ACaption, TextRect, [tfLeft, tfSingleLine, tfVerticalCenter]);

  //Draw caption
  Canvas.Draw(0, 0, CaptionBitmap);
  CaptionBitmap.Free;

  //Draw left border
  CaptionRect := Rect(0, BorderRect.Top, BorderRect.Left, ARect.Height - BorderRect.Bottom);
  LDetails := Style.GetElementDetails(twFrameLeftActive);
  if CaptionRect.Bottom - CaptionRect.Top > 0 then
    Style.DrawElement(Canvas.Handle, LDetails, CaptionRect);

  //Draw right border
  CaptionRect := Rect(ARect.Width - BorderRect.Right, BorderRect.Top, ARect.Width, ARect.Height - BorderRect.Bottom);
  LDetails := Style.GetElementDetails(twFrameRightActive);
  Style.DrawElement(Canvas.Handle, LDetails, CaptionRect);

  //Draw Bottom border
  CaptionRect := Rect(0, ARect.Height - BorderRect.Bottom, ARect.Width, ARect.Height);
  LDetails := Style.GetElementDetails(twFrameBottomActive);
  Style.DrawElement(Canvas.Handle, LDetails, CaptionRect);
end;
Finally joining all the pieces we can access the objects, bitmaps, colors and fonts of any VCl style, no matter where is located (embedded in a resource or in a external file).

The library and the demo application of the above image is available in the code google site.
Stay tuned for more updates of this library, the next updates will be include HSL, RGB effects to VCL Styles, vcl style explorer and so on.
Exploring Delphi XE2 – VCL Styles Part II
The TStyleHook Class
The VCL Styles uses the TStyleHook class to intercept the paint methods and the Windows messages related to the Vcl Styles operations, If you have a custom control or need change the way how a control like a TEdit, TMemo, TListView, etc. is painted you must create a new Style hook class inheriting from TStyleHook or using a existing like TEditStyleHook, TComboBoxStyleHook, TMemoStyleHook ans so on . After of creating your own hook you need to register your new style hook class using the RegisterStyleHook method. Also you can unregister a register style hook using the UnRegisterStyleHook procedure.
Check these samples of using custom TStyleHook classes
- Fixing a VCL Style bug in the TPageControl and TTabControl components
- How to make a transparent form when a VCL Style is enabled?
- Fix for TRibbon and VCL styles
A Real World Sample
All the above links are about fixing bugs related to the VCL Styles. but that is not all what you can do do with the TStyleHook classes, for example check this image of a TSynEdit component inside of an VCL application with has the Carbon Vcl Style applied.

As you can see the scrollbars are not painted using the selected VCL style. So what I can do? In this case you can write a new style hook class or use an existing hook style. After of quick look for the existing style hook classes in the Vcl.StdCtrls unit, you will discover that the TMemoStyleHook class can do the work.
So writting just one line of code
TStyleManager.Engine.RegisterStyleHook(TCustomSynEdit, TMemoStyleHook);
The magic is done.

A Little of hack
When you need register a style hook using the RegisterStyleHook method, if you try to register the same hook class twice, an EStyleEngineException will be raised, So before to try to register a new hook class you must check if is the hook is already registered for a specific control or use a place like the initialization part of a unit to register the hooks . Unfortunally an extensive part of the VCL styles logic and the collections containing the registered style hooks, is contained in sealed classes, strict private vars and strict private static classes. So that information is not accessible directly. Because that, tasks how list the registered hooks, check if a hook has previously registered or if a class has a register style hook are not trivial.
The TCustomStyleEngine class (of the Vcl.Themes unit) has a strict protected class property called RegisteredStyleHooks this property points to a TDictionary declarated (as a private type) like this
    TStyleHookList = TList<TStyleHookClass>;
    TStyleHookDictionary = TDictionary<TClass, TStyleHookList>;
The info contained in this property is very usefull, but due to his visibility (strict protected class property) you need to use a hack to extract such info.
So using a helper class for the TCustomStyleEngine class you can gain access to the TDictionary with the registered hooks
type
  TStyleHookList = TList<TStyleHookClass>;  //you must need declare this type again because are declarated in the private section of the TCustomStyleEngine and are not visible
  TStyleHookDictionary = TDictionary<TClass, TStyleHookList>;//you must need declare this type again because are declarated in the private section of the TCustomStyleEngine and are not visible
  TCustomStyleEngineHelper = Class Helper for TCustomStyleEngine
  public
    class function GetRegisteredStyleHooks : TStyleHookDictionary;
  end;
And now using this helper class you can construct additional functions to work with the Style hooks.
Procedure ApplyEmptyVCLStyleHook(ControlClass :TClass);
Procedure RemoveEmptyVCLStyleHook(ControlClass :TClass);
function  IsStyleHookRegistered(ControlClass: TClass; StyleHookClass: TStyleHookClass) : Boolean;
function  GetRegisteredStylesHooks(ControlClass: TClass) : TStyleHookList;
Using these functions you can list all the registerd style hooks in the system like so
var
 RttiType  : TRttiType;
 Item      : TListItem;
 List      : TStyleHookList;
 StyleClass: TStyleHookClass;
begin
  for RttiType in TRttiContext.Create.GetTypes do
    if RttiType.IsInstance and RttiType.AsInstance.MetaclassType.InheritsFrom(TComponent) then
    begin
       List:=GetRegisteredStylesHooks(RttiType.AsInstance.MetaclassType);
       if Assigned(List) then
       begin
         Item:=ListViewStyleHooks.Items.Add;
         Item.Caption:=RttiType.Name;

         for StyleClass in List do
          Item.SubItems.Add(StyleClass.ClassName);
       end;
    end;
end;
This is the code of the unit containing all the above code
unit uVCLStyleUtils;

interface

Uses
  Vcl.Themes,
  Vcl.Styles,
  Generics.Collections,
  Classes;

type
  TStyleHookList = TList<TStyleHookClass>;

Procedure ApplyEmptyVCLStyleHook(ControlClass :TClass);
Procedure RemoveEmptyVCLStyleHook(ControlClass :TClass);
function  IsStyleHookRegistered(ControlClass: TClass; StyleHookClass: TStyleHookClass) : Boolean;
function  GetRegisteredStylesHooks(ControlClass: TClass) : TStyleHookList;

implementation

uses
 Sysutils;

type
  TStyleHookDictionary = TDictionary<TClass, TStyleHookList>;
  TCustomStyleEngineHelper = Class Helper for TCustomStyleEngine
  public
    class function GetRegisteredStyleHooks : TStyleHookDictionary;
  end;


class function TCustomStyleEngineHelper.GetRegisteredStyleHooks: TStyleHookDictionary;
begin
  Result:= Self.FRegisteredStyleHooks;
end;

function  IsStyleHookRegistered(ControlClass: TClass; StyleHookClass: TStyleHookClass) : Boolean;
var
  List : TStyleHookList;
begin
 Result:=False;
    if TCustomStyleEngine.GetRegisteredStyleHooks.ContainsKey(ControlClass) then
    begin
      List := TCustomStyleEngine.GetRegisteredStyleHooks[ControlClass];
      Result:=List.IndexOf(StyleHookClass) <> -1;
    end;
end;

function  GetRegisteredStylesHooks(ControlClass: TClass) : TStyleHookList;
begin
 Result:=nil;
    if TCustomStyleEngine.GetRegisteredStyleHooks.ContainsKey(ControlClass) then
      Result:=TCustomStyleEngine.GetRegisteredStyleHooks[ControlClass];
end;

Procedure ApplyEmptyVCLStyleHook(ControlClass :TClass);
begin
   if not IsStyleHookRegistered(ControlClass, TStyleHook) then
    TStyleManager.Engine.RegisterStyleHook(ControlClass, TStyleHook);
end;

Procedure RemoveEmptyVCLStyleHook(ControlClass :TClass);
begin
   if IsStyleHookRegistered(ControlClass, TStyleHook) then
    TStyleManager.Engine.UnRegisterStyleHook(ControlClass, TStyleHook);
end;


end.
Check the full source code on Github.
Fixing a VCL Style bug in the TPageControl and TTabControl components
Update : this bug was fixed in the Update 4 of Delphi XE2.
The BUG
The BUG
Yesterday while I’ve working migrating a personal project to Delphi XE2, I found a bug(QC #101346) in the TPageControl and TTabControl components. The issue is related to the images (icons) which are drawn in the tab controls when an ImageList is associated to the component. check the next sample image

In the above image, the form contains two components a TPageControl and a TTabControl, and both has an imagelist associated. Now if you change the VCL style of this form you will get this result.

As you can see when the Vcl Style is applied the images associated to the tabs are changed. So after a few minutes debugging the source code of the VCL when the Style is enabled, I found the issue in the DrawTab method of the TTabControlStyleHook class. This class is the responsible of call the drawing functions (of the TTabControl and TCustomTabControl) associated to a particular VCL style when and Style is enabled.
The main problem is in this line
procedure TTabControlStyleHook.DrawTab(Canvas: TCanvas; Index: Integer);
..
..
..
..
    if StyleServices.Available then
      StyleServices.DrawIcon(Canvas.Handle, Details, GlyphR, Images.Handle, Index);
..
..
As are you noted the problem is which the DrawIcon method is called passing the Index of the tab and not the index of image associated (imageindex) to the tab.
The Fix
So what I can do now?, First I report the issue to the Quality Central, and the I begin to work in a temporal solution until this problem was fixed by embarcadero. The Fix was create a new Style Hook class and register this class to be used by the style manager when a TPageControl or TTabControl are painted.
This is the source code of the style hook class
uses
  Vcl.Graphics,
  Winapi.Windows,
  Vcl.ComCtrls;

type
  TMyTabControlStyleHook = class(TTabControlStyleHook)
  strict private
    procedure AngleTextOut(Canvas: TCanvas; Angle: Integer; X, Y: Integer; const Text: string);//need to implemented because this method is strict private and can't be accessed directly
    function GetImageIndex(TabIndex: Integer): Integer;//helper class to retrieve the "real imageindex"
  strict protected
    procedure DrawTab(Canvas: TCanvas; Index: Integer); override;//a new implementation of the DrawTab method
  end;

implementation

Uses
  Vcl.Themes,
  System.Classes;

type
  THackCustomTabControl  =class (TCustomTabControl);

{ TMyTabControlStyleHook }

procedure TMyTabControlStyleHook.AngleTextOut(Canvas: TCanvas; Angle, X,
  Y: Integer; const Text: string);
var
  NewFontHandle, OldFontHandle: hFont;
  LogRec: TLogFont;
begin
  GetObject(Canvas.Font.Handle, SizeOf(LogRec), Addr(LogRec));
  LogRec.lfEscapement := Angle * 10;
  LogRec.lfOrientation := LogRec.lfEscapement;
  NewFontHandle := CreateFontIndirect(LogRec);
  OldFontHandle := SelectObject(Canvas.Handle, NewFontHandle);
  SetBkMode(Canvas.Handle, TRANSPARENT);
  Canvas.TextOut(X, Y, Text);
  NewFontHandle := SelectObject(Canvas.Handle, OldFontHandle);
  DeleteObject(NewFontHandle);
end;

//this function retrieve the "real" image index of a tab based on the tab index.
function TMyTabControlStyleHook.GetImageIndex(TabIndex: Integer): Integer;
begin
  Result:=-1;
  if (Control <> nil) and (Control is TCustomTabControl) then
   Result:=THackCustomTabControl(Control).GetImageIndex(TabIndex);
end;

//Patch to the DrawTab method
procedure TMyTabControlStyleHook.DrawTab(Canvas: TCanvas; Index: Integer);
var
  R, LayoutR, GlyphR: TRect;
  ImageWidth, ImageHeight, ImageStep, TX, TY: Integer;
  DrawState: TThemedTab;
  Details: TThemedElementDetails;
  ThemeTextColor: TColor;
  ImageIndex:Integer;
begin
  ImageIndex:=GetImageIndex(Index); //get the real image index

  if (Images <> nil) and (ImageIndex < Images.Count) then
  begin
    ImageWidth := Images.Width;
    ImageHeight := Images.Height;
    ImageStep := 3;
  end
  else
  begin
    ImageWidth := 0;
    ImageHeight := 0;
    ImageStep := 0;
  end;

  R := TabRect[Index];
  if R.Left < 0 then Exit;

  if TabPosition in [tpTop, tpBottom] then
  begin
    if Index = TabIndex then
      InflateRect(R, 0, 2);
  end
  else if Index = TabIndex then
    Dec(R.Left, 2) else Dec(R.Right, 2);

  Canvas.Font.Assign(THackCustomTabControl(Control).Font);//access the original protected font property using a helper hack class
  LayoutR := R;
  DrawState := ttTabDontCare;
  case TabPosition of
    tpTop:
      begin
        if Index = TabIndex then
          DrawState := ttTabItemSelected
        else if (Index = HotTabIndex) and MouseInControl then
          DrawState := ttTabItemHot
        else
          DrawState := ttTabItemNormal;
      end;
    tpLeft:
      begin
        if Index = TabIndex then
          DrawState := ttTabItemLeftEdgeSelected
        else if (Index = HotTabIndex) and MouseInControl then
          DrawState := ttTabItemLeftEdgeHot
        else
          DrawState := ttTabItemLeftEdgeNormal;
      end;
    tpBottom:
      begin
        if Index = TabIndex then
          DrawState := ttTabItemBothEdgeSelected
        else if (Index = HotTabIndex) and MouseInControl then
          DrawState := ttTabItemBothEdgeHot
        else
          DrawState := ttTabItemBothEdgeNormal;
      end;
    tpRight:
      begin
        if Index = TabIndex then
          DrawState := ttTabItemRightEdgeSelected
        else if (Index = HotTabIndex) and MouseInControl then
          DrawState := ttTabItemRightEdgeHot
        else
          DrawState := ttTabItemRightEdgeNormal;
      end;
  end;

  if StyleServices.Available then
  begin
    Details := StyleServices.GetElementDetails(DrawState);
    StyleServices.DrawElement(Canvas.Handle, Details, R);
  end;

  if (Images <> nil) and (ImageIndex < Images.Count) then//check the bounds of the image index to draw
  begin
    GlyphR := LayoutR;
    case TabPosition of
      tpTop, tpBottom:
        begin
          GlyphR.Left := GlyphR.Left + ImageStep;
          GlyphR.Right := GlyphR.Left + ImageWidth;
          LayoutR.Left := GlyphR.Right;
          GlyphR.Top := GlyphR.Top + (GlyphR.Bottom - GlyphR.Top) div 2 - ImageHeight div 2;
          if (TabPosition = tpTop) and (Index = TabIndex) then
            OffsetRect(GlyphR, 0, -1)
          else if (TabPosition = tpBottom) and (Index = TabIndex) then
            OffsetRect(GlyphR, 0, 1);
        end;
      tpLeft:
        begin
          GlyphR.Bottom := GlyphR.Bottom - ImageStep;
          GlyphR.Top := GlyphR.Bottom - ImageHeight;
          LayoutR.Bottom := GlyphR.Top;
          GlyphR.Left := GlyphR.Left + (GlyphR.Right - GlyphR.Left) div 2 - ImageWidth div 2;
        end;
      tpRight:
        begin
          GlyphR.Top := GlyphR.Top + ImageStep;
          GlyphR.Bottom := GlyphR.Top + ImageHeight;
          LayoutR.Top := GlyphR.Bottom;
          GlyphR.Left := GlyphR.Left + (GlyphR.Right - GlyphR.Left) div 2 - ImageWidth div 2;
        end;
    end;
    if StyleServices.Available then
      StyleServices.DrawIcon(Canvas.Handle, Details, GlyphR, Images.Handle, ImageIndex);//Here the Magic is made using the "real" imageindex of the tab
  end;

  if StyleServices.Available then
  begin
    if (TabPosition = tpTop) and (Index = TabIndex) then
      OffsetRect(LayoutR, 0, -1)
    else if (TabPosition = tpBottom) and (Index = TabIndex) then
      OffsetRect(LayoutR, 0, 1);

    if TabPosition = tpLeft then
    begin
      TX := LayoutR.Left + (LayoutR.Right - LayoutR.Left) div 2 -
        Canvas.TextHeight(Tabs[Index]) div 2;
      TY := LayoutR.Top + (LayoutR.Bottom - LayoutR.Top) div 2 +
        Canvas.TextWidth(Tabs[Index]) div 2;
     if StyleServices.GetElementColor(Details, ecTextColor, ThemeTextColor) then
       Canvas.Font.Color := ThemeTextColor;
      AngleTextOut(Canvas, 90, TX, TY, Tabs[Index]);
    end
    else if TabPosition = tpRight then
    begin
      TX := LayoutR.Left + (LayoutR.Right - LayoutR.Left) div 2 +
        Canvas.TextHeight(Tabs[Index]) div 2;
      TY := LayoutR.Top + (LayoutR.Bottom - LayoutR.Top) div 2 -
        Canvas.TextWidth(Tabs[Index]) div 2;
      if StyleServices.GetElementColor(Details, ecTextColor, ThemeTextColor)
      then
        Canvas.Font.Color := ThemeTextColor;
      AngleTextOut(Canvas, -90, TX, TY, Tabs[Index]);
    end
    else
      DrawControlText(Canvas, Details, Tabs[Index], LayoutR, DT_VCENTER or DT_CENTER or DT_SINGLELINE  or DT_NOCLIP);
  end;
end;


end.
Now before to use this new class in our code we need to unregister the original style hook class and then register the new one, using the UnRegisterStyleHook and RegisterStyleHook methods, check this code.
   TStyleManager.Engine.UnRegisterStyleHook(TCustomTabControl, TTabControlStyleHook);//unregister the original style hook for the TCustomTabControl components
   TStyleManager.Engine.RegisterStyleHook(TCustomTabControl, TMyTabControlStyleHook);//register the new style hook class
   TStyleManager.Engine.UnRegisterStyleHook(TTabControl, TTabControlStyleHook);//unregister the original style hook for the TTabControl components
   TStyleManager.Engine.RegisterStyleHook(TTabControl, TMyTabControlStyleHook);//register the new style hook class
And this is the final result (Now the tabs show the correct image)

I hope which this short article was useful for you, and you see one of the uses which you can made of the RegisterStyleHook and UnRegisterStyleHook methods ;).
Check the sample project source on Github.
Exploring Delphi XE2 – Tweaking the FireMonkey Styles
 Maybe you’ve seen articles about how use the FireMonkey Styles, and how you can set almost every aspect of a visual control, today I will go a step forward to show how you can adjust the HSL (Hue, Saturation, and Lightness) values or a particular RGB component of the colors that belongs to a FireMonkey style.
Introduction
Fortunately the format of the styles used by FireMonkey is stored in a human readable format very similar to our old dfm format (Delphi forms), this allows us to understand how FireMonkey store, read and use these styles and of course make cool stuff with this.
Now look the next piece of a FireMonkey style and pays attention to the highlighted values
  object TRectangle
    StyleName = 'backgroundstyle'
    Position.Point = '(396,476)'
    Width = 50.000000000000000000
    Height = 50.000000000000000000
    HitTest = False
    DesignVisible = False
    Fill.Color = xFF505050
    Stroke.Kind = bkNone
  end
  object TRectangle
    StyleName = 'panelstyle'
    Position.Point = '(396,476)'
    Width = 50.000000000000000000
    Height = 50.000000000000000000
    HitTest = False
    DesignVisible = False
    Fill.Color = xFF404040
    Stroke.Kind = bkNone
    XRadius = 3.000000000000000000
    YRadius = 3.000000000000000000
  end
  object TCalloutRectangle
    StyleName = 'calloutpanelstyle'
    Position.Point = '(396,476)'
    Width = 50.000000000000000000
    Height = 50.000000000000000000
    HitTest = False
    DesignVisible = False
    Fill.Color = xFF404040
    Stroke.Kind = bkNone
    XRadius = 3.000000000000000000
    YRadius = 3.000000000000000000
    CalloutWidth = 23.000000000000000000
    CalloutLength = 11.000000000000000000
  end
      object TText
        StyleName = 'text'
        Position.Point = '(15,-8)'
        Locked = True
        Width = 50.000000000000000000
        Height = 17.000000000000000000
        ClipParent = True
        HitTest = False
        AutoSize = True
        Fill.Color = claWhite
        Text = 'Groupbox'
        WordWrap = False
      end
As you can see the colors of the FireMonkey style elements are stored in a hexadecimal format or using the name of the predefined FireMonkey colors , and these are the values we need to modify.
The FireMonkey styles can be embedded in the resource property of a TStyleBook component or in a .Style file. In order to modify these values we need to parse the style and locate all entries which represent a TAlphaColor.
Parsing a FireMonkey Style
The first thing that jumps out is that the root component of is a TLayout object and the style format only defines a tree of objects. So the general idea is iterate over all the TAlphaColor properties, modify the colors and then write back to the TStyleBook.Resource property the modified TLayout.
So the first idea is, Hey I can load this tree of objects in a TLayout and then using the RTTI and a recursive function I can set all the properties which are of the type TAlphaColor.
So you will write something like this to create the TLayout object
 Stream:=TStringStream.Create;
 try
   s:=FStyleBook.Resource.Text;
   Stream.WriteString(s);
   Stream.Position:=0;
   FLayout:=TLayout(CreateObjectFromStream(nil,Stream));
 finally
  Stream.Free;
 end;
And now you will write a nice recursive function using the RTTI to set all the Colors of all the children objects. you will check which works ok (the colors are modified as you want) and then you will write the modified Style to the TLayout.Resource property. But stop we can’t use this method to do this task because the properties stored in FireMonkey Style is just a subset of all the properties of each object let me explain :
This is a TText object
  TText = class(TShape)
   //only showing the published properties.
  published
    property AutoSize: Boolean read FAutoSize write SetAutoSize default False;
    property Fill;
    property Font: TFont read FFont write SetFont;
    property HorzTextAlign: TTextAlign read FHorzTextAlign write SetHorzTextAlign
      default TTextAlign.taCenter;
    property VertTextAlign: TTextAlign read FVertTextAlign write SetVertTextAlign
      default TTextAlign.taCenter;
    property Text: string read FText write SetText;
    property Stretch: Boolean read FStretch write SetStretch default False;
    property WordWrap: Boolean read FWordWrap write SetWordWrap default True;
  end;
And this is how a TText object is stored in a FireMonkey Style
    object TText
      StyleName = 'text'
      Align = alClient
      Locked = True
      Width = 49.000000000000000000
      Height = 20.000000000000000000
      HitTest = False
      Fill.Color = xFFE0E0E0
      Text = 'label'
    end
As you can see if you use the RTTI way to set the new color values and then write the object back you will passing all the properties to the object and finally you will create a giant modified
FireMonkey style which will slow down our application. So what is the solution? well just parse the text of the style manually and determine using a simple algorithm if the entry (line) to process is a TAlphaColor or not.
In this point you have many options, you can use a regular expression, or create an array with the name of all possible entries to process like Fill.Color, Color, Stroke.Color and so on, and all this just to process a line like Fill.Color = xFFE0E0E0. But I choose more simple option, just dividing a line in 2 components called Name and Value.
Let me show you with a piece of code.
First define a structure to hold the data of the style to modify.
 TFMStyleLine=record
  Index   : Integer;
 IsColor : Boolean;
  Name    : string;
  Value   : string;
 Color : TAlphaColor;
 end;

 FLines : TList<TFMStyleLine>;
and then write a procedure to parse the FireMonkey Style
//this function determine if a particular line of the resource property is a AlphaColor
function PropIsColor(const Name, Value: string): Boolean;
begin
 Result:=(CompareText(Name,'Color')=0) or (Pos('.Color',Name)>0) or (StartsText('cla',Value)) or (Length(Value)=9) and (Value[1]='x'));
end;

//Fill a generic list with the lines which have a color property
procedure FillList;
var
  i : integer;
  ALine : TFMStyleLine;
  p : integer;
begin
  FLines.Clear;
  for i := 0 to FStyleBook.Resource.Count-1 do
  begin
    ALine.IsColor:=False;
    ALine.Name:='';
    ALine.Value:='';
    ALine.Color:=claNull;
    //Determine if the line has a = sign
    p:=Pos('=',FStyleBook.Resource[i]);
     if p>0 then
     begin
       //get the name of the property
       ALine.Name :=Trim(Copy(FStyleBook.Resource[i],1,p-1));
       //get the value of the property
       ALine.Value:=Trim(Copy(FStyleBook.Resource[i],p+1));
       //check if is the line has a color
       ALine.IsColor:=PropIsColor(ALine.Name, ALine.Value);
       if ALine.IsColor then
       begin
         //store the index of the line from the resource to modify
         ALine.Index:=i;
         ALine.Color :=StringToAlphaColor(ALine.Value);
         //add the record to the collection
         FLines.Add(ALine);
       end;
     end;
  end;
end;
As you can see the logic is very simple (sure can be improved) and works.
Making the changes
In this point we have a list with all the colors to modify, so we can to start applying the operations over the colors to change the HSL and RGB components.
//this procedure modify the RGB components of the colors stored in the generics list, adding a delta value (1..255) for each component (R, G, B)
procedure ChangeRGB(dR, dG, dB: Byte);
var
  i : Integer;
  v : TFMStyleLine;
begin
  for i := 0 to FLines.Count-1 do
   //only modify the lines which contains a Color <>  claNull
   if FLines[i].IsColor and (FLines[i].Color<>claNull) then
    begin
      v:=FLines[i];
      TAlphaColorRec(v.Color).R:=TAlphaColorRec(v.Color).R+dR;
      TAlphaColorRec(v.Color).G:=TAlphaColorRec(v.Color).G+dG;
      TAlphaColorRec(v.Color).B:=TAlphaColorRec(v.Color).B+dB;
      if v.Color<>FMod[i].Color then
        FMod[i]:=v;
    end;
end;

//this procedure modify the HSL values from the colors stored in generic list
procedure ChangeHSL(dH, dS, dL: Single);
var
  i : Integer;
  v : TFMStyleLine;
begin
  for i := 0 to FLines.Count-1 do
   //only modify the lines which contains a Color <>  claNull
   if FLines[i].IsColor and (FLines[i].Color<>claNull) then
    begin
      v:=FLines[i];
      v.Color:=(FMX.Types.ChangeHSL(v.Color,dH,dS,dL));
      if v.Color<>FMod[i].Color then
        FMod[i]:=v;
    end;
end;
And now an example of how use this code. check the next form which has the Blend style (included with Delphi XE)

Now executing this code for the HSL transformation
Var
 Eq : TStyleEqualizer;
begin
 Eq:= TStyleEqualizer.Create;
 try
  Eq.StyleBook:=StyleBook1;
  Eq.ChangeHSL(130/360,5/100,0);
  Eq.Refresh;
 finally
  Eq.Free;
 end;
end;
we have this result

Now executing this code for the RGB transformation
Var
 Eq : TStyleEqualizer;
begin
 Eq:= TStyleEqualizer.Create;
 try
  Eq.StyleBook:=StyleBook1;
  Eq.ChangeRGB(50,0,0);
  Eq.Refresh;
 finally
  Eq.Free;
 end;
end;

The Application
Finally I wrote an application that uses the functions described above to modify in runtime any FireMonkey Style and let you save the changes creating a new style in just a few clicks.
Check this video to see the application in action
Check the source code on Github.
Tools updated , Now supports Delphi XE2
This is only going to be a short entry just to inform that the Delphi IDE Theme Editor and the WMI Delphi Code Creator are now compatible with Delphi XE2.


Exploring Delphi XE2 – VCL Styles Part I
 The new version of Rad Studio include a very nice feature called VCL Styles, this functionality allows you to apply a skin (theme) to any VCL Form application. So in this post I will show you the basics about how load in runtime an embedded style or read the style file directly from the disk. besides as how you can easily create a new style.
Working with VCL Styles
You can add a VCL Style to your application directly from the Delphi IDE menu entry Project-> Options -> Application -> Appearance Selecting the styles which you want to include in your Application and choosing a default style to apply. when you select a style, this is stored in the exe as a resource of the type VCLSTYLE with a 80 kb size approx by style.

In order to work with the VCL Styles you must use the TStyleManager class located in the Themes unit and include the Vcl.Styles unit to enable the VCL styles support.
Registering a Style
To load (register) a VCL Style from a File you must use the LoadFromFile function of the TStyleManager class.
procedure RegisterStyleFromDisk(const StyleFileName: string);
begin
 try
   if TStyleManager.IsValidStyle(StyleFileName) then
     TStyleManager.LoadFromFile(StyleFileName); //beware in this line you are only loading and registering a VCL Style and not setting as the current style.
   else
     ShowMessage('the Style is not valid');
end;
And to load an style from a resource use the LoadFromResource or TryLoadFromResource
procedure RegisterStyleFromResource(const StyleResource: string);
begin
   TStyleManager.LoadFromResource(HInstance, StyleResource); //beware in this line you are only loading and registering a VCL Style and not setting as the current style.
end;
Setting a Style
To set in Runtime an already loaded (registered) style you must use the SetStyle(or TrySetStyle) procedure.
The SetStyle function has 3 overloaded versions
Use this version when you want set a registered style using his name
//class procedure SetStyle(const Name: string); overload;
TStyleManager.SetStyle('StyleName');
Use this version when you want set registered style using a instance to the style
//class procedure SetStyle(Style: TCustomStyleServices); overload;
TStyleManager.SetStyle(TStyleManager.Style['StyleName']);
And finally use this version when you has a handle to the style returned by the functions LoadFromFile and LoadFromResource
//class procedure SetStyle(Handle: TStyleServicesHandle); overload;
TStyleManager.SetStyle(TStyleManager.LoadFromFile(StyleFileName))
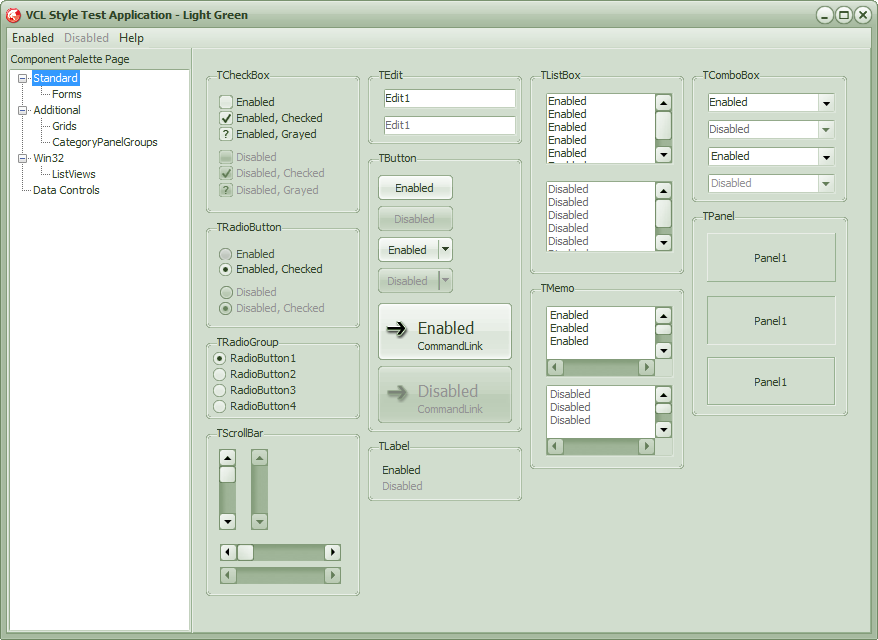
Finally using the above functions I wrote a simple app to register and set VCL Styles

Download the source code and binaries from here
Creating New Styles
The Rad Studio XE2 includes the VCL Style designer which is a very handy tool to edit and create new VCL Styles, you can call this tool from the IDE Menu Tools -> VCL Style designer or executing directly (the file VclStyleDesigner.exe) form the bin directory where the Rad Studio is installed. this is an image of the tool

The main element is the image under the images category, which define how the control will be drawn, also you can edit every single aspect of the Style like the buttons, checkboxes, scrollbars and so on.
The Rad Studio XE2 only includes 5 predefined styles in the <Documents>\RAD Studio\9.0\Styles folder, But you can easily create your own styles using a predefined theme as template, check the next list of steps to create a New Style.
- First from the VCL Style designer load the style to use as template using the File->Open option
- Now go to the Image->Export option to save the image as png

- Then Load the Image in your prefered image editor and play a little, for example changing the hue and saturation of the image.

- Now back in the VCL Style designer go to the option Image->Update , select the modified image and then press ok in the dialog

- Then go to the Style->Assign Colors option to let the application adjust the colors of the style according to the new image.
- Now press F9 or Test->Style to check the result

- Finally modify the name of the Style and use the option File->Save As to store your new creation.
Following these simple steps in a few minutes I create a set of new styles ready to use.


Download the Styles from here
Tip : you can copy the styles to the <Documents>\RAD Studio\9.0\Styles folder and these will be recognized by Rad Studio XE2 when your open the Project-> Options -> Application -> Appearance option)
